The Letterpress Process
 alt="lead type">
Before I get into the letterpress process I would like sing praises to the Almighty, Jim Irwin, master printer and owner of Letterpress Finesse here in Tucson (www.letterpressfinesse.com).
alt="lead type">
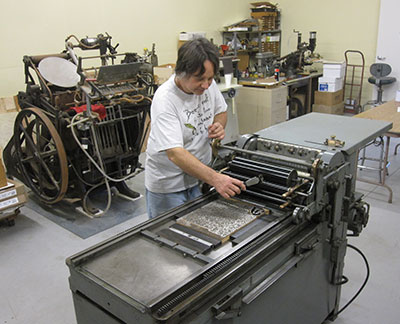
Before I get into the letterpress process I would like sing praises to the Almighty, Jim Irwin, master printer and owner of Letterpress Finesse here in Tucson (www.letterpressfinesse.com).On a whim I called Jim back in 2010 and asked him if he would be willing to "teach me letterpress." He said sure, as long as I was willing to help out a little around the shop — sweep the floor, sort type, that sort of thing. In exchange I could look over his shoulder and ask as many questions as I wanted. I had a lot of questions. Five years later I still do, and Jim is still answering them for me. When I'm facing a printing problem in my studio I stop and think, "What did Jim do when this happened?" Problem solved! Jim's been a great mentor. The best. Thanks Jim for making me a better printer. (Photo below is Jim in his shop, inking up a Vandercook cylinder press.)
 alt="Jim Irwin">
Unlike the other two processes I've covered: linocut and bookmaking, the letterpress process, especially with platen presses, is quite involved. Where you could conceivably be carving and printing a linoleum block in a few hours with no prior knowledge, learning to be a competent press operator takes time. Lots of time. Because the science and art of letterpress printing is so involved, I'll just cover some basics here.
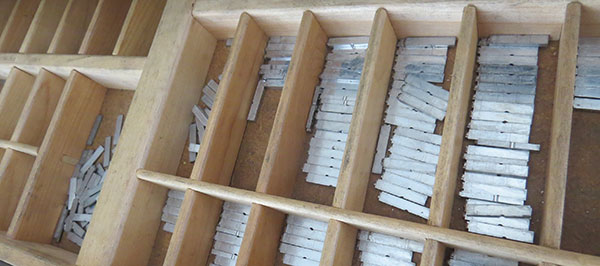
Paul Marvalelas in his book Letterpress Printing: A manual for modern fine art printers defines letterpress as "The process and equipment used to print text from type." If you have any involvement with letterpress you know that the term is used much more broadly than that. But we'll stick with his definition for a moment: the process used to print text from type. On The Remembered Earth page I showed the steps I took to hand-set lead type, lock the form up in a chase, and print. That's traditional letterpress.
These days, however, more and more letterpress printers use photopolymer plates instead of lead type. Besides text, the plates can include line art, halftones, decorative elements, and more. For most printers these plates must be ordered from a company with platemaking equipment, such as Boxcar Press.
Here's a quick tour of a print project involving a photopolymer plate.
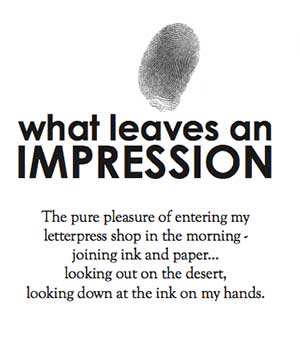
First, I create my artwork using PhotoShop, Illustrator and/or InDesign. I send an electronic file with my artwork to Boxcar Press. The file looks like this...
Within a week I receive my photopolymer plate. It has an adhesive backing so that it can be applied to a base. The photo below shows the plate affixed to the base and the base locked-up in the chase, ready to go to the press. (If you are curious about what the chase looks like on the press, go to the Linocut Process page.)

I have decided to use two ink colors, black and red. My finished piece looks like this.
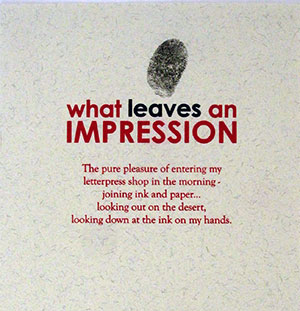
Getting the two colors requires running the pieces through the press twice. For the red colored text I mask off the fingerprint and the word "leaves" using what is called a frisket; for the black color I mask off everything except the fingerprint and the word "leaves."
What is exciting is that letterpress equipment can be applied to new uses. Using my C&P platen press to print linocuts is one example. Another is the amazing printed effects artists are getting using proof presses like the Vanderkook. Fifteenth century technology put to twenty-first century uses. Who would have guessed!